It is important to have the tubing in your earmould replaced every six
months. With time, the tubing will harden and this will affect the sound
quality. You are welcome to book an appointment at the Adult Hearing
Aid Centre to have your earmould retubed, however if you would like
to have a go yourself please ask your audiologist for some spare tubing
and see the instructions below.
Step 1
Detach your earmould from the transparent hook part of the hearing aid. Clean and dry your earmould to remove any dirt and grease.

Step 2
Pull the old tubing out of the earmould. Keep the old tube, you will need it later.
• If this proves difficult, try soaking the mould in hot (not boiling) water for 5 minutes
• Pliers can also be used to pull the tube out.

Step 3
Take a new piece of tubing and taper one end to make a thin point. Thread it through the hole in the earmould towards the part that goes down your ear until it comes out the end. 
Step 4
Using your fingers or the pliers pull the tube through until the bend reaches the mould and the tube turns directly upwards.

Step 5
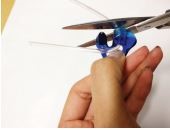
Cut the tapered end off as close to the mould as possible. This can be done with scissors or a scalpel. Be careful not the cut the mould by accident!


Step 6
Use the old tube removed in step 2 to measure the length of the new tube
and cut where appropriate. Reattach to the hearing aid.

At the end
Your mould reattached to the hearing aid should look like this.


